Why have a Calendar Table?
Almost every data set contains a column with dates. A common issue faced by newcomers to data modeling is how to create a relationship between dates in different tables.
Example: You have an [Orders] table and and [Deliveries] table; both tables have a date column, the [order date] and [delivery date] respectively. In your report, you would like users to be able to select a single date or range of dates and then view both orders and deliveries within that range.
Creating a “Calendar Table” or “Date Dimension” in your Power BI model solves this by allowing you to create relationships between all your data columns that relate to dates.

Without a calendar table, you can only show monthly order quantity and delivery quantity in separate charts, because they are from separate data tables:
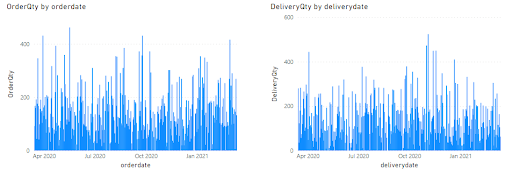
To limit the result period of these two charts, you will have to perform filtering on each chart individually because there is no relationship between the order and delivery tables. The more data tables you have, the more you will need to repeat.
Here is an example with a Calendar Table:
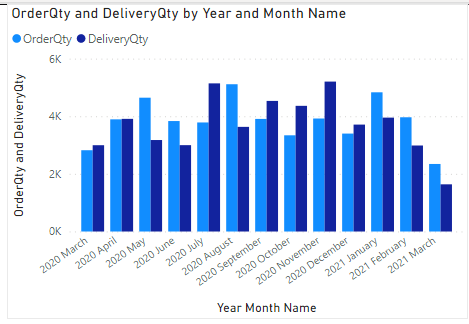
You are now able to put both results into a single chart linking the two separate data tables through date relationships. This allows you to perform accurate comparisons as well as slice the data using other date period categories that you create in the Calendar Table (year, month day name, week starting, etc.). If you want to add date period categories, you only need to create them once in the Calendar Table.
How to create a Calendar Table
When creating a Calendar Table, the most challenging step is creating a new table with a list of dates, followed by the transformations. Follow the steps below to easily create a Calendar Table.
1. Enter Power Query Editor through Home tab 🡪 Transform data 🡪 Transform data
2. Once Power Query Editor is open, go to: Home tab 🡪 New Source 🡪 Blank Query
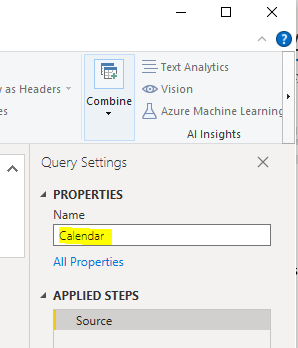
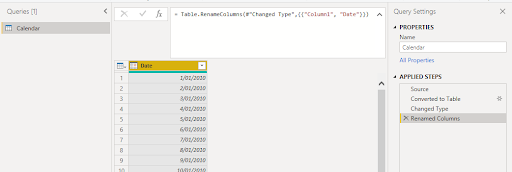
3. Rename the query under Query Settings 🡪 Properties on the right hand side. Let’s name it Calendar.
4. Now for the most technical part: You will be copying this script into the formula bar of this query, but before that you will need to set a desired start date for your calendar table. Do this by replacing the year, month, day in the second and third line of this script (in this example the calendar table will start from 1st Jan 2010 to current date):
#date(2010,1,1),
Duration.Days(Date.From(DateTime.LocalNow())-#date(2010,1,1))+1,
#duration(1,0,0,0))
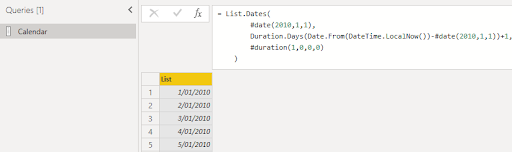
After inserting the script, a list of dates will be generated.
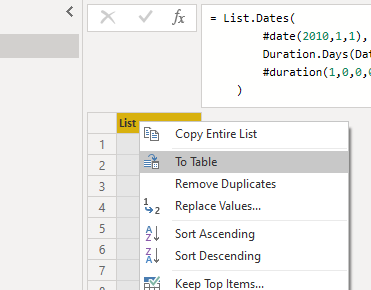
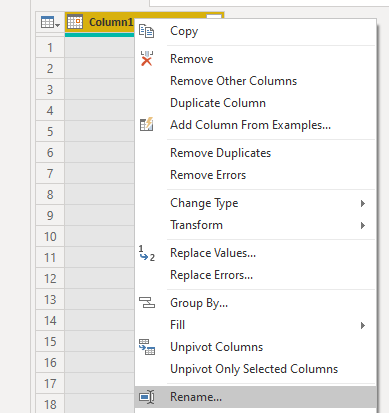
5. You need to convert this list to a table before you can do anything further with it. To do so, simply right click on the column header:
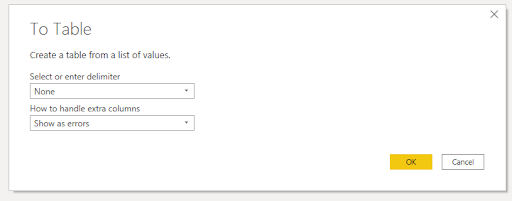
You will then get this prompt window. Follow the selections and click OK.
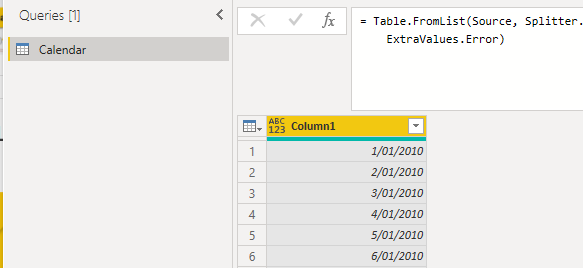
6. Now the display icon for OrderDate has changed to a table icon.
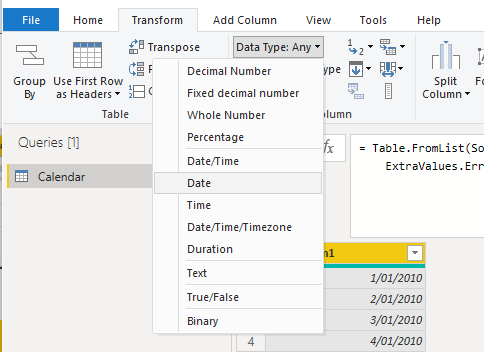
You then need to select Column1 and set it to the correct data type. Go to Transform 🡪 Data type 🡪 Date.
7. Next, right click on the Column1 header and rename this column to Date.
8. You now have a basic date table to work on!
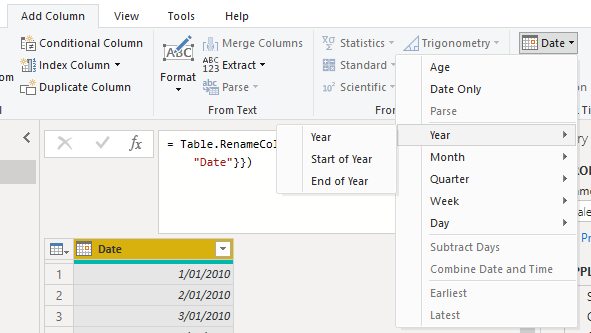
9. From here, you can easily add all sorts of calendar related categories by selecting the Date column header, and then going to:
Add Column 🡪 Date 🡪 Year/Month/Quarter/Week/Day 🡪 various selections.
You then need to select Column1 and set it to the correct data type. Go to Transform 🡪 Data type 🡪 Date.
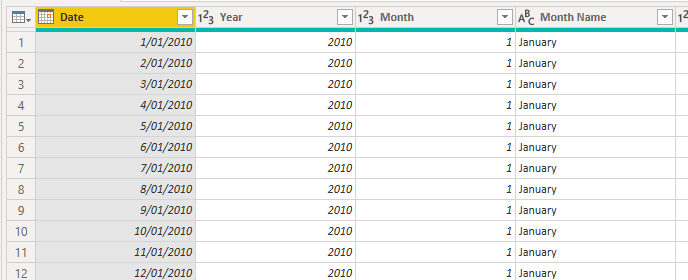
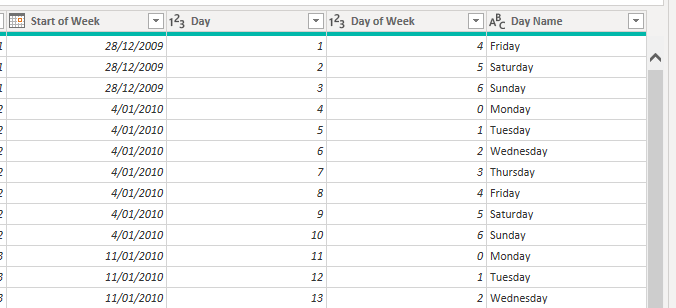
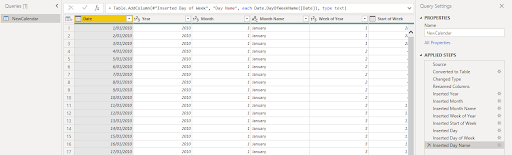
10. You can also keep track of the columns you have added in the right-hand side Applied Steps:
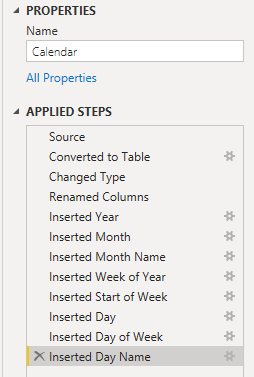
As you can see, in this exercise we have added Year, Month, Month Name, Week of Year, Start of Week, Day, Day of Week, Day Name.
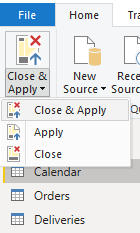
11. Now you have a Calendar Table! Once you have imported all your other data sources, go to Home 🡪 Close & Apply to import them into the Power BI data model.
12. Link your data to the Calendar Table:
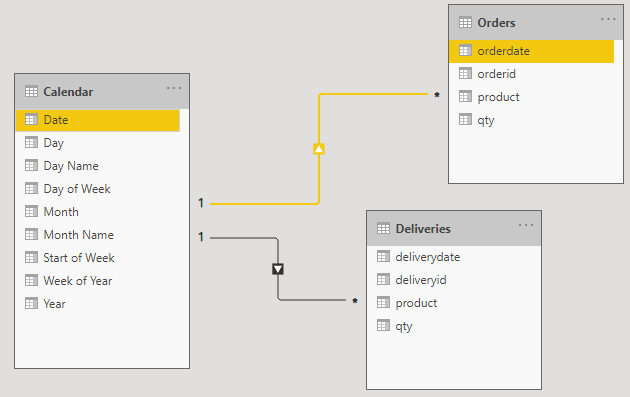
You can now link the Calendar.Date column to multiple tables with dates in them, and be able to filter/categorise them all at once.
13. Sort by column: It is very important to set the proper sorting order for text columns in your Calendar Table, such as month name or day name. As they are text type data, Power BI will end up sorting them alphabetically:
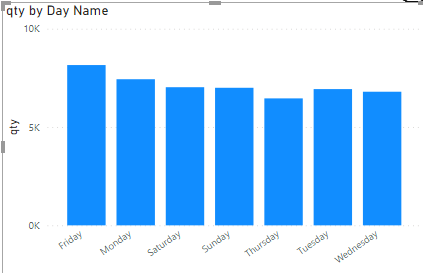
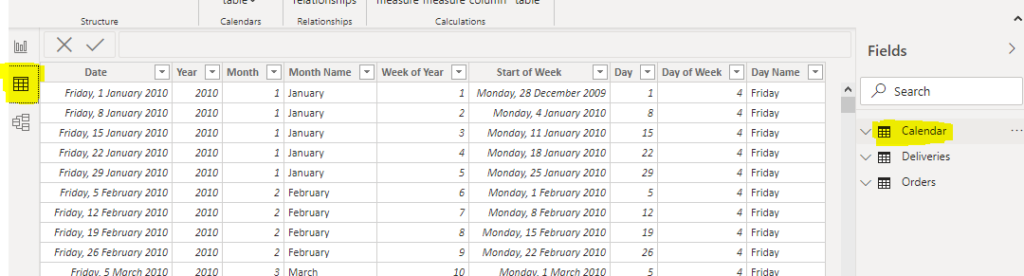
To fix the sorting order of Day Name, you will need to go to table view and select Calendar Table:
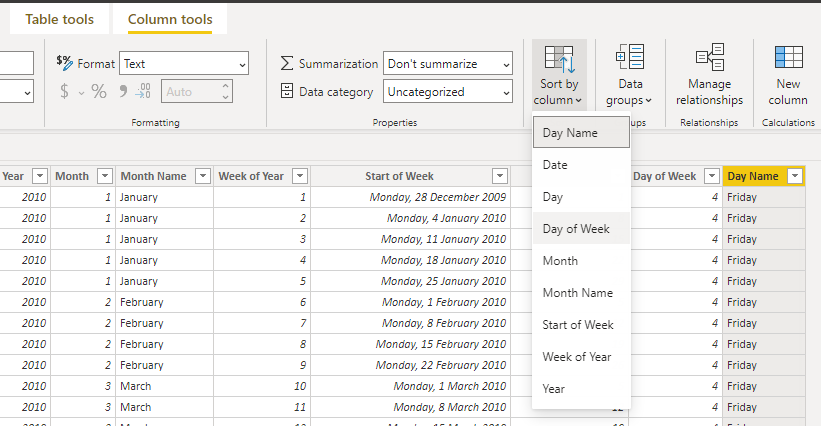
And then select column header of Day Name and go to Column tools 🡪 Sort by column 🡪 Day of Week.
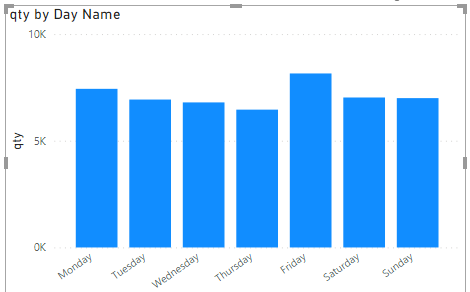
Day Name will now sort based on the Day of week number column:
Why create a Calendar Table in Power Query instead of using a Calculated DAX table?
The main reason for creating a Calendar Table in Power Query rather than using a calculated table in DAX is better data compression. Another benefit is most of the columns you add into the Calendar Table can be created just by clicking your mouse – no coding is required for computed columns!
Reuse Calendar Table
Now that you see the benefit of having a Calendar Table, you’ll want to add one in every Power BI model you create. Fortunately, you do not need to go through the same creation procedure again.
You can copy the entire Calendar Table Power Query script in Power Query Editor under
Home 🡪 Advanced Editor.
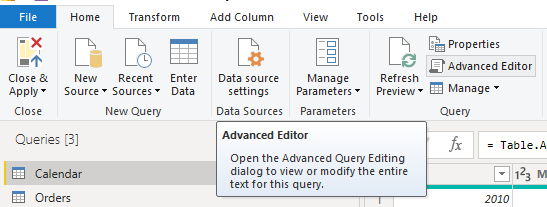
Once the Advanced Editor window pops up, you’ll have access to the script of the entire Calendar Table that you created:
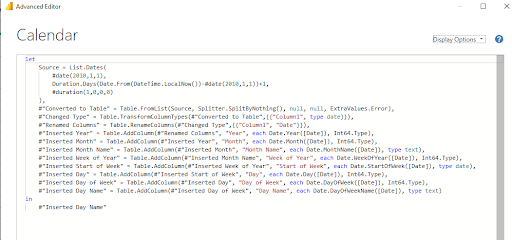
You can save this code somewhere (Word/OneNote/notepad etc.).
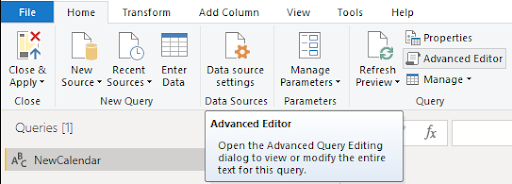
Now when you are in a new Power BI report, follow Steps 1-3 in our Calendar Table creation example to create a new blank query.
Then go to the Advanced Editor for this new query, delete the existing script, and paste in the existing Calendar Table script you saved from the previous step.
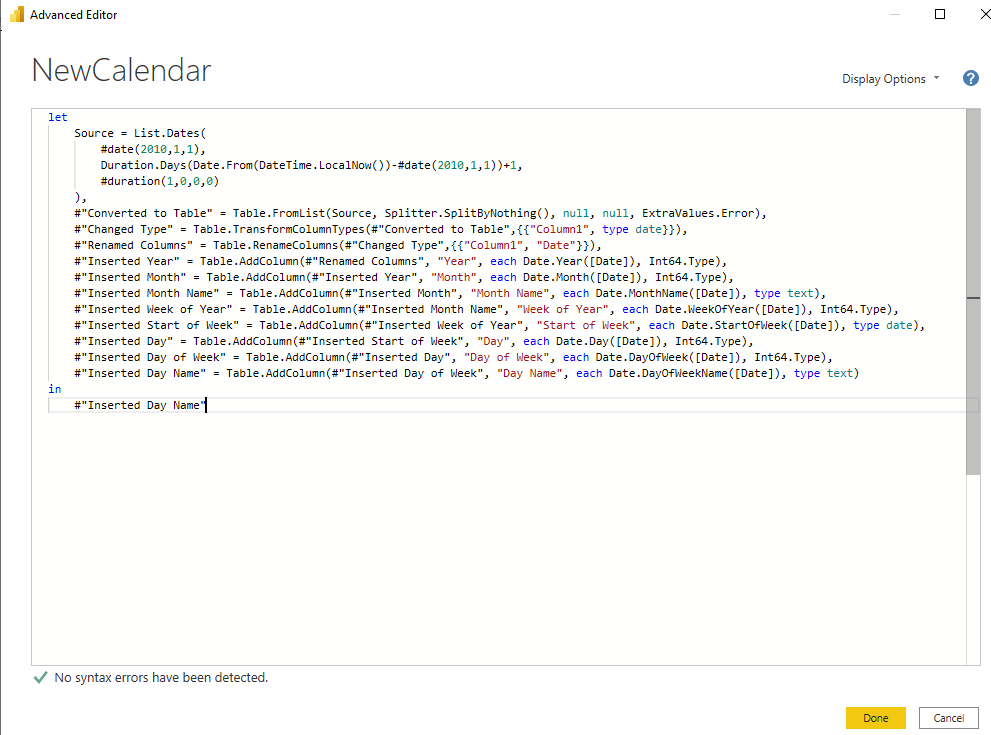
You have now replicated a Calendar Table with copy and paste.
We have created a script you can copy and paste to create your own Calendar Table below.
					let
    CalendarTableStartDate = #date(2020, 1, 1),
    FinancialYearStartMonth = 7,
    Source = List.Dates(
        CalendarTableStartDate,
        Duration.Days(Date.From(DateTime.FixedLocalNow())-CalendarTableStartDate)+1,
        #duration(1,0,0,0)
    ),
    #"Converted to Table" = Table.FromList(Source, Splitter.SplitByNothing(), null, null, ExtraValues.Error),
    #"Changed Type" = Table.TransformColumnTypes(#"Converted to Table",{{"Column1", type date}}),
    #"Renamed Columns" = Table.RenameColumns(#"Changed Type",{{"Column1", "Date"}}),
    #"Inserted Year" = Table.AddColumn(#"Renamed Columns", "Year", each Date.Year([Date]), Int64.Type),
    #"Inserted Month" = Table.AddColumn(#"Inserted Year", "Month", each Date.Month([Date]), Int64.Type),
    #"Inserted Month Name" = Table.AddColumn(#"Inserted Month", "Month Name", each Date.MonthName([Date]), type text),
    #"Inserted Week of Year" = Table.AddColumn(#"Inserted Month Name", "Week of Year", each Date.WeekOfYear([Date]), Int64.Type),
    #"Inserted Start of Week" = Table.AddColumn(#"Inserted Week of Year", "Start of Week", each Date.StartOfWeek([Date]), type date),
    #"Inserted Day" = Table.AddColumn(#"Inserted Start of Week", "Day", each Date.Day([Date]), Int64.Type),
    #"Inserted Day of Week" = Table.AddColumn(#"Inserted Day", "Day of Week", each Date.DayOfWeek([Date])+1, Int64.Type),
    #"Inserted Day Name" = Table.AddColumn(#"Inserted Day of Week", "Day Name", each Date.DayOfWeekName([Date]), type text),
    #"Inserted Days in Month" = Table.AddColumn(#"Inserted Day Name", "Days in Month", each Date.DaysInMonth([Date]), Int64.Type),
    #"Inserted Quarter" = Table.AddColumn(#"Inserted Days in Month", "Quarter", each Date.QuarterOfYear([Date]), Int64.Type),
    #"Renamed Columns1" = Table.RenameColumns(#"Inserted Quarter",{{"Quarter", "Quarter of Year"}}),
    #"Inserted Start of Quarter" = Table.AddColumn(#"Renamed Columns1", "Start of Quarter", each Date.StartOfQuarter([Date]), type date),
    #"Inserted End of Quarter" = Table.AddColumn(#"Inserted Start of Quarter", "End of Quarter", each Date.EndOfQuarter([Date]), type date),
    #"Inserted End of Week" = Table.AddColumn(#"Inserted End of Quarter", "End of Week", each Date.EndOfWeek([Date]), type date),
    #"Inserted Week of Month" = Table.AddColumn(#"Inserted End of Week", "Week of Month", each Date.WeekOfMonth([Date]), Int64.Type),
    #"Inserted Day of Year" = Table.AddColumn(#"Inserted Week of Month", "Day of Year", each Date.DayOfYear([Date]), Int64.Type),
    #"Added Custom" = Table.AddColumn(#"Inserted Day of Year", "Year Quarter", each Number.ToText([Year])&"Q"&Number.ToText([Quarter of Year])),
    #"Added Custom1" = Table.AddColumn(#"Added Custom", "YearMonth", each if [Month]<10
then Number.ToText([Year])&"0"&Number.ToText([Month])
else Number.ToText([Year])&Number.ToText([Month])),
    #"Changed Type1" = Table.TransformColumnTypes(#"Added Custom1",{{"YearMonth", Int64.Type}}),
    #"Reordered Columns" = Table.ReorderColumns(#"Changed Type1",{"Date", "Year", "Quarter of Year", "Year Quarter", "Start of Quarter", "End of Quarter", "Month", "YearMonth", "Month Name", "Days in Month", "Week of Year", "Week of Month", "Start of Week", "End of Week", "Day", "Day of Week", "Day Name"}),
    #"Added Custom2" = Table.AddColumn(#"Reordered Columns", "Financial Year", each if FinancialYearStartMonth>=7
then
   if [Month] >= FinancialYearStartMonth
   then [Year]+1
   else [Year]
else
   if [Month] >= FinancialYearStartMonth
   then [Year]
   else [Year]-1),
    #"Added Custom3" = Table.AddColumn(#"Added Custom2", "Financial Month", each if [Month]>= FinancialYearStartMonth
then [Month] - (FinancialYearStartMonth-1)
else [Month] + (12-FinancialYearStartMonth)+1),
    #"Added Custom4" = Table.AddColumn(#"Added Custom3", "Financial Quarter of Year", each if [Financial Month]>=1 and [Financial Month] <= 3
then 1
else
if [Financial Month]>=4 and [Financial Month] <= 6
then 2
else
if [Financial Month]>=7 and [Financial Month] <= 9
then 3
else 4),
    #"Added Custom5" = Table.AddColumn(#"Added Custom4", "Financial YearQuarter", each Number.ToText([Financial Year])&"Q"&Number.ToText([Financial Quarter of Year])),
    #"Added Custom6" = Table.AddColumn(#"Added Custom5", "Financial YearMonth", each if [Financial Month]<10
then Number.ToText([Financial Year])&"0"&Number.ToText([Financial Month])
else Number.ToText([Financial Year])&Number.ToText([Financial Month])),
    #"Added Custom7" = Table.AddColumn(#"Added Custom6", "Financial Week", each if #date([Year],[Month],[Day]) >= (#date([Year],FinancialYearStartMonth,1))
then
([Week of Year] - ((Date.WeekOfYear(#date([Year],FinancialYearStartMonth,1))))) +1
else
(Date.WeekOfYear(#date([Year],12,31)) - Date.WeekOfYear(#date([Year],FinancialYearStartMonth,1))) + [Week of Year]),
    #"Added Custom8" = Table.AddColumn(#"Added Custom7", "WeekDay Flag", each if Date.DayOfWeek([Date])+1>5
then 0
else 1),
    #"Reordered Columns1" = Table.ReorderColumns(#"Added Custom8",{"Date", "Year", "Quarter of Year", "Year Quarter", "Start of Quarter", "End of Quarter", "Month", "YearMonth", "Month Name", "Days in Month", "Week of Year", "Week of Month", "Start of Week", "End of Week", "Day", "Day of Year", "Day of Week", "Day Name", "WeekDay Flag", "Financial Year", "Financial Quarter of Year", "Financial YearQuarter", "Financial Month", "Financial YearMonth", "Financial Week"})
in
    #"Reordered Columns1"
Note that our script has parameterised Calendar Table Start Date and Financial Year Start Month so you only need to input them once at the very top of the script:

If the financial month starts after July, then all months from the start month onwards will be considered Year+1 financial year. If the financial month starts before July, then all months from the start month onwards will be considered Current Year financial year.