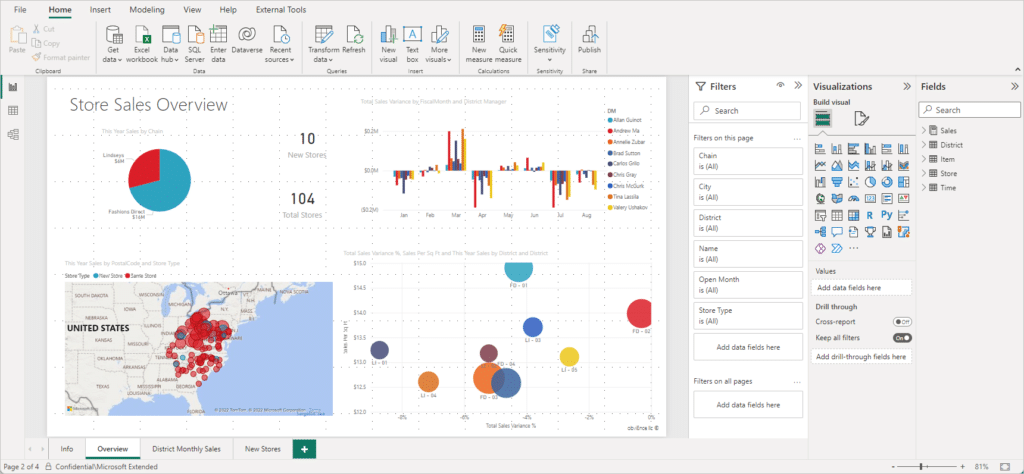
One of the most powerful features of Power BI is its ability to connect to a wide variety of data sources. Whether your data resides in spreadsheets, cloud services, or enterprise databases, Power BI makes the data connection process seamless and intuitive. This capability is what allows businesses to centralize their analytics and create impactful visualizations.
In this guide, we’ll walk through the steps of setting up a data connection in Power BI, exploring the different types of sources you can connect to, and sharing best practices for managing your data connections.

What is a Data Connection in Power BI?
A data connection in Power BI is the link established between your data source and the Power BI platform. This connection enables you to import, transform, and visualize data from multiple sources, all in one unified workspace. Power BI supports a wide range of data sources, including:
- Files (Excel, CSV, XML, JSON)
- Databases (SQL Server, MySQL, Oracle)
- Online Services (Google Analytics, Salesforce, SharePoint)
- Cloud Platforms (Azure, AWS, Google Cloud)
The versatility of Power BI’s data connection options makes it a go-to solution for organizations working with diverse datasets.
Types of Data Connections in Power BI
Power BI offers two primary methods for connecting to data:
1. Import Mode
In this mode, data is imported and stored in Power BI’s internal database. This provides faster performance and allows for offline data analysis. However, it may not reflect real-time updates from the source.
2. DirectQuery Mode
DirectQuery establishes a live connection to the data source, ensuring real-time updates are reflected in your reports. While this mode eliminates data duplication, it relies on the performance of the underlying data source.
How to Set Up a Data Connection in Power BI
Here’s a step-by-step guide to creating a data connection in Power BI Desktop:
Step 1: Launch Power BI Desktop
Open Power BI Desktop and click on the “Get Data” button located in the Home ribbon.
Step 2: Choose Your Data Source
In the Get Data window, you’ll see a list of available data sources categorized by type. Select your desired source, such as Excel, SQL Server, or a web API.
Step 3: Authenticate Your Connection
Depending on the source, you may need to provide authentication credentials, such as a username, password, or API key. For secure enterprise databases, use organizational credentials.
Step 4: Select the Data to Load
After connecting, Power BI will display a preview of the available data tables. Select the tables or fields you want to import.
Step 5: Transform Your Data (Optional)
Power BI’s Power Query Editor opens automatically, allowing you to clean and transform your data before loading it into the model. For example:
- Remove unnecessary columns.
- Fix formatting issues.
- Apply filters to limit the data imported.
Step 6: Load the Data
Once the data is ready, click “Close & Apply” to load it into Power BI. The data is now available for visualization and analysis.
Common Data Sources and How to Connect Them
Excel Files
- Select Excel Workbook under File options in the Get Data menu.
- Browse to your file location and click Open.
- Choose the sheets or tables you want to import.
SQL Server Databases
- Select SQL Server under Database options in the Get Data menu.
- Enter the server name and database credentials.
- Use DirectQuery for live data or Import mode for offline analysis.
SharePoint Lists
- Choose SharePoint Online List under Online Services in the Get Data menu.
- Enter the SharePoint site URL and log in with your Microsoft account.
- Select the lists you want to import.
Web APIs
- Choose Web under Other options in the Get Data menu.
- Enter the API endpoint URL.
- Authenticate and transform the data as needed.
Best Practices for Managing Data Connections
Maintain Data Quality
Ensure your data source is clean and well-organized before connecting it to Power BI. This reduces the need for extensive transformations.
Choose the Right Mode
Use Import mode for faster performance and DirectQuery for real-time data updates. Select the mode based on your use case.
Monitor Connection Performance
For large datasets, optimize your queries to reduce latency and improve dashboard responsiveness.
Secure Your Data
Use encrypted connections and role-based access to safeguard sensitive information.
Refresh Your Data
Set up automatic refresh schedules in the Power BI Service to ensure your dashboards always reflect the latest data.
Real-World Example: Connecting CRM Data to Power BI
Imagine a sales manager who wants to track customer interactions stored in Salesforce. Here’s how they establish a data connection in Power BI:
- Select Salesforce Objects in the Get Data menu.
- Authenticate with their Salesforce credentials.
- Select the objects containing customer data, such as accounts and opportunities.
- Transform the data in Power Query to calculate metrics like lead conversion rates.
- Load the data into Power BI and create a dashboard to visualize customer engagement trends.
This seamless integration allows the sales manager to monitor performance and make data-driven decisions in real time.
Conclusion
Mastering the data connection process in Power BI is essential for creating insightful reports and dashboards. Whether you’re pulling data from spreadsheets, databases, or online services, Power BI simplifies the process, enabling you to focus on analysis rather than preparation. By following the steps outlined in this guide and adhering to best practices, you can ensure your data is clean, secure, and ready for impactful visualizations.
Ready to unlock the power of Power BI’s data connection capabilities? Contact us today for tailored support and guidance in connecting your data sources seamlessly. Let’s empower your analytics journey together!
